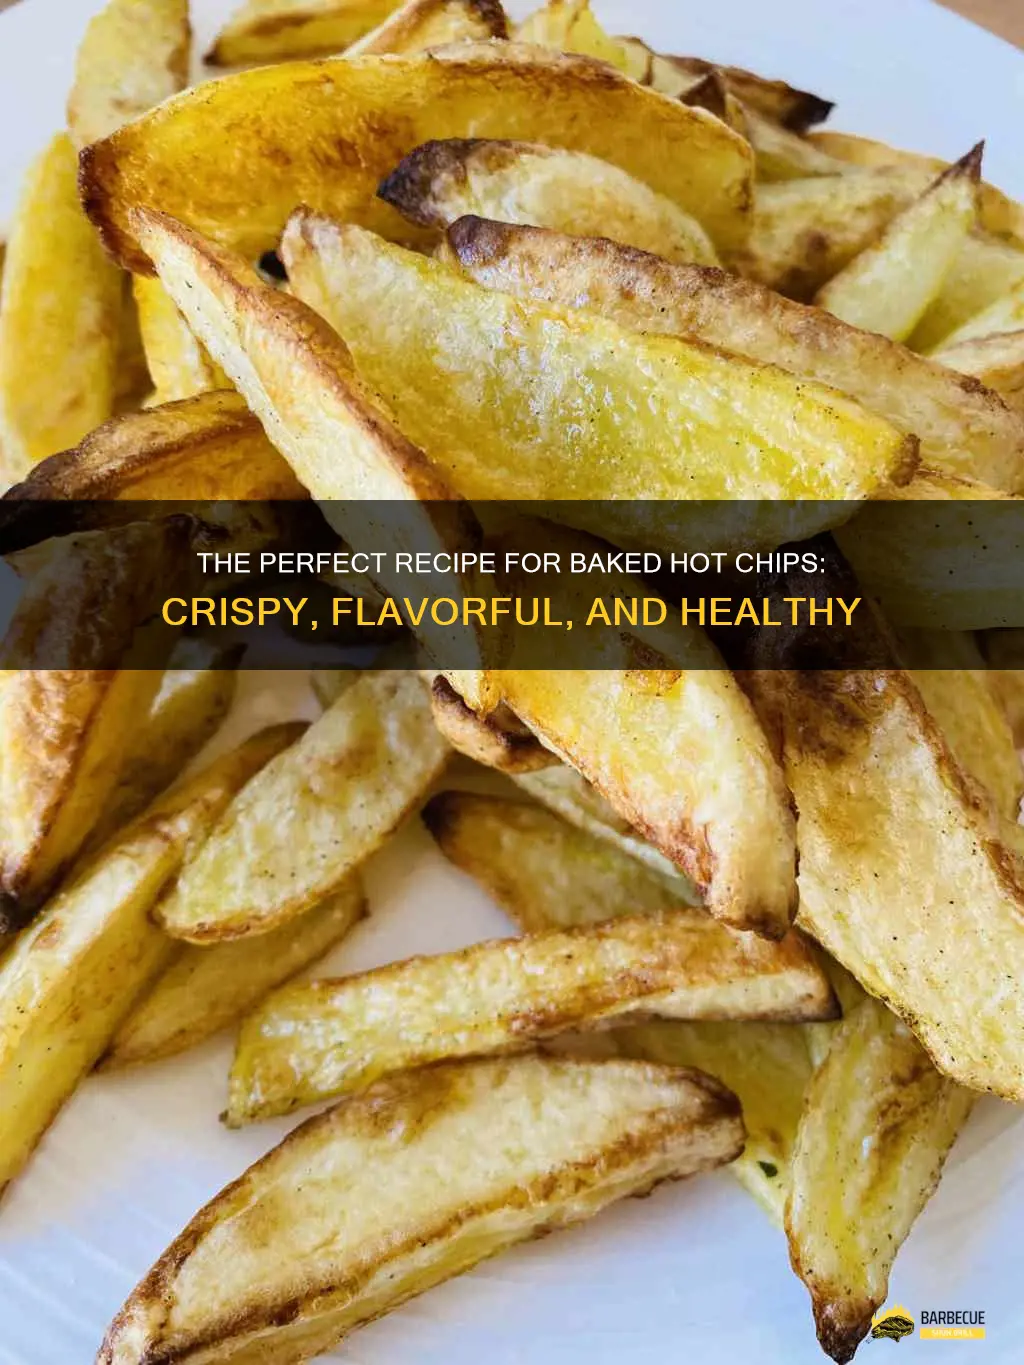
Do you ever find yourself craving a crispy, crunchy snack that won't leave you feeling guilty afterwards? Look no further than homemade baked hot chips! These delicious treats are not only easy to make, but they also offer a healthier alternative to traditional fried chips. In just a few simple steps, you can transform slices of potatoes into a savory snack that is sure to satisfy your cravings. So, grab your apron and get ready to learn how to make your very own batch of irresistible baked hot chips that will leave you wanting more.
| Characteristics | Values |
|---|---|
| Type of potato | Russet or Yukon Gold |
| Thickness | 1/8 inch |
| Seasonings | Salt, pepper, paprika |
| Cooking temperature | 400 degrees Fahrenheit |
| Cooking time | 20-25 minutes |
| Flip halfway through cooking | Yes |
| Cooling time | 5 minutes |
| Serve with | Ketchup or mayonnaise |
![]()
Ingredients for Baked Hot Chips
Looking for a delicious and crispy snack to enjoy with your friends and family? Look no further! Baked hot chips are a healthier alternative to traditional fried potato chips and can be made easily with just a few simple ingredients. In this blog post, we will guide you through the process of making these irresistible treats, starting with the key ingredient – potatoes.
Potatoes:
To make baked hot chips, you will need a good variety of potatoes that are suitable for baking. Russet potatoes are commonly used for making chips as they have a high starch content, which helps achieve that coveted crispiness. Start by washing the potatoes thoroughly to remove any dirt. You can leave the skin on for added flavor and texture, or peel them if you prefer.
Olive oil:
Next up is the key ingredient that gives these chips a crispy and golden exterior – olive oil. Olive oil not only adds flavor but also helps the chips crisp up nicely in the oven. Drizzle a generous amount of olive oil over the sliced potatoes, ensuring they are well-coated. You can use a brush or your hands to evenly distribute the oil.
Salt:
No chip is complete without a sprinkle of salt. Sprinkle salt over the oiled potato slices to enhance their flavor. Use sea salt or kosher salt for a more intense taste. The amount of salt you use will depend on your personal preference, so feel free to adjust it accordingly.
Pepper:
For an additional burst of flavor, you can add freshly ground black pepper to your chips. This spice not only complements the natural flavors of the potatoes but also adds a subtle hint of heat. Sprinkle a pinch of black pepper over the potato slices, ensuring they are evenly seasoned.
Optional seasonings (e.g., paprika, garlic powder):
To take your baked hot chips to the next level, you can experiment with various optional seasonings such as paprika or garlic powder. These spices add an extra layer of taste and aroma to your chips. Simply sprinkle a small amount of your desired seasoning over the potato slices before baking. Be cautious not to overpower the chips with too much seasoning – a light dusting is all you need.
Once you have prepared your potato slices and seasoned them to perfection, it's time to bake them in the oven. Preheat your oven to 400°F (200°C) and arrange the potato slices on a baking sheet in a single layer. Ensure they are not overlapping for even baking. Bake the chips for approximately 15-20 minutes or until they turn golden brown and crispy.
Remember to keep an eye on them as cooking times may vary depending on your oven and the thickness of the slices. Once they are done, remove them from the oven and let them cool for a few minutes before enjoying. The chips will continue to crisp up as they cool down.
Baked hot chips are best enjoyed fresh out of the oven. Serve them as a standalone snack or pair them with your favorite dips, such as salsa, guacamole, or sour cream. These chips are sure to be a hit at any gathering, and you can feel good about indulging in this healthier alternative to store-bought or fried chips.
So, gather your ingredients, preheat your oven, and get ready to savor these homemade baked hot chips. With their crispy texture and delicious flavors, they are bound to become a household favorite in no time. Happy baking!
Perfectly Baked Bread: How to Use a Cake Pan for Delicious Results
You may want to see also
![]()
Preparation
Preheat the oven to 425°F (220°C):
The first step in preparing oven-baked potatoes is to preheat the oven. Preheating the oven ensures that the potatoes cook evenly and at the right temperature. Set the oven to 425°F (220°C) and allow it to preheat for about 10 minutes.
Wash and scrub the potatoes:
Next, it is important to wash and scrub the potatoes thoroughly. This step is necessary to remove any dirt or debris from the surface of the potatoes. Use a vegetable brush under cool running water to scrub each potato, paying extra attention to any stubborn dirt or blemishes. Once the potatoes are clean, pat them dry with a clean towel.
Cut the potatoes into thin slices or wedges:
After cleaning the potatoes, it is time to cut them into thin slices or wedges. This step not only helps to cook the potatoes faster but also adds a nice presentation to the dish. Start by removing any eyes or blemishes from the surface of the potatoes with a paring knife. Then, place the potatoes on a cutting board and slice them into even-sized pieces. If you prefer thin slices, cut the potatoes into rounds of about ¼ inch thickness. For wedges, cut the potatoes in half lengthwise and then into wedges by cutting at an angle.
It is important to remember that the size and thickness of the potatoes will affect the cooking time, so try to keep them as uniform as possible. Additionally, when cutting the potatoes, make sure to exercise caution and use a sharp knife to prevent any accidents.
In conclusion, preparation is a fundamental step in cooking oven-baked potatoes. By preheating the oven, washing and scrubbing the potatoes, and cutting them into thin slices or wedges, you can ensure that your dish turns out delicious and well-cooked. So, roll up your sleeves and get ready to create a tantalizing side dish or a delicious main course with these beautifully prepared potatoes.
Can You Successfully Bake Frozen London Broil for a Delicious Meal?
You may want to see also
![]()
Seasoning the Chips
Chips, or more commonly known as French fries, are a beloved classic that pair perfectly with burgers, sandwiches, or simply on their own. While it's easy to pick up a bag of frozen chips from the grocery store, there's something special about making them from scratch. One of the key steps in creating the perfect homemade chips is seasoning them just right. In this blog, we'll walk you through the process of seasoning your chips to perfection.
Drizzle olive oil over the sliced potatoes
The first step in seasoning your chips is to drizzle olive oil over the sliced potatoes. Olive oil provides a delicious and healthy base for the seasonings to adhere to. Start by preheating your oven to 425°F (220°C). While the oven is heating up, take your freshly sliced potatoes and place them in a large bowl. Drizzle a generous amount of olive oil over the potatoes, ensuring that each slice is coated evenly. Using your hands or a spatula, gently toss the potatoes until they are well coated with the olive oil. This step is crucial as it helps the seasoning stick to the chips during the cooking process.
Sprinkle salt and pepper to taste
Once your potatoes have been coated in olive oil, it's time to season them with salt and pepper. Salt is an essential seasoning that helps enhance the natural flavors of the chips. Begin by sprinkling a moderate amount of salt over the potatoes, making sure to distribute it evenly. If you prefer a lighter touch of salt, you can sprinkle it sparingly and adjust to your taste. Similarly, add a pinch of freshly ground black pepper to enhance the flavor even further. The salt and pepper should be applied immediately after the olive oil to ensure they stick to the chips during baking.
Add optional seasonings for extra flavor
To take your chips to the next level, you can add optional seasonings for extra flavor. While a classic salt and pepper seasoning is delicious on its own, experimenting with different flavors can make your homemade chips truly special. Some popular options include garlic powder, paprika, cayenne pepper, or mixed herbs. If you're feeling adventurous, you can even try adding a touch of grated Parmesan cheese or a sprinkle of chili powder for a spicy kick. The key is to sprinkle the optional seasonings over the chips after the salt and pepper. Be sure to distribute the seasonings evenly throughout the batch by tossing gently or using a spatula.
By following these simple steps, you can elevate your homemade chips from ordinary to extraordinary. The combination of olive oil, salt, pepper, and optional seasonings will infuse your chips with incredible flavor. Remember to preheat your oven, drizzle olive oil over the potatoes, sprinkle salt and pepper to taste, and add optional seasonings for the finishing touch. With a little bit of time and effort, you'll be rewarded with delicious, seasoned chips that are crispy on the outside and tender on the inside. So, the next time you're craving some chips, skip the store-bought bag and try seasoning them yourself – you won't be disappointed!
Understanding the Likelihood of a Baker's Cyst Refilling
You may want to see also
![]()
Baking the Chips
Lay the seasoned potato slices in a single layer on a baking sheet
To begin baking the chips, preheat your oven to 400 degrees Fahrenheit (200 degrees Celsius) and gather your ingredients: potatoes, olive oil, salt, and any additional seasonings of your choice, such as garlic powder or paprika.
Start by washing and scrubbing the potatoes to remove any dirt or debris. If desired, you can leave the nutritious potato skins intact for added flavor and texture. Afterward, pat them dry with a paper towel or clean kitchen cloth.
Next, using a sharp knife or a mandoline slicer, carefully slice the potatoes into thin, uniform rounds. Aim for a thickness of around 1/8 of an inch (3 millimeters) to ensure even cooking. This step is important to achieve crispy and evenly baked chips.
Once sliced, transfer the potato rounds to a large bowl and drizzle them with olive oil. Use enough oil to lightly coat each slice; about 2 to 3 tablespoons should be sufficient for 4 to 6 potatoes. Toss the potatoes thoroughly to ensure each slice is evenly coated.
Now it's time to season the chips. Sprinkle salt evenly over the potatoes, or add any other seasonings you prefer, such as garlic powder, paprika, or even a touch of cayenne pepper for a hint of spice. Mix everything together, making sure the seasonings are evenly distributed among the potato slices.
Bake in the preheated oven for 25-30 minutes or until golden brown and crispy
Prepare a large baking sheet by lining it with parchment paper or lightly greasing it with cooking spray. This will prevent the chips from sticking and make cleanup easier.
Spread the seasoned potato slices on the baking sheet in a single layer, ensuring they do not overlap. This will allow each chip to bake evenly and promote optimal crispiness.
Place the baking sheet in the preheated oven and let the chips bake for approximately 25 to 30 minutes. However, keep an eye on them as cooking times may vary depending on your oven and the thickness of your potato slices.
Flip the chips halfway through cooking to ensure even browning
About halfway through the cooking time, carefully remove the baking sheet from the oven using oven mitts or heat-resistant gloves, and gently flip each chip over. This step is essential for achieving an even golden brown color on both sides.
Once you've flipped the chips, return the baking sheet to the oven and continue baking for the remaining time. The exact cooking duration may vary, but you'll know the chips are ready when they turn a beautiful golden brown color and become crispy.
Remove from the oven and let cool slightly before serving
Once the chips have reached the desired level of crispiness, carefully remove the baking sheet from the oven and place it on a heat-resistant surface.
Allow the chips to cool for a few minutes on the baking sheet before transferring them to a wire rack or a paper towel-lined plate to cool completely. During this time, the chips will continue to firm up and become even crispier.
Serve the baked chips while they are still warm for maximum enjoyment. They can be enjoyed on their own as a snack, paired with dips, or served alongside a delicious sandwich or burger. Stored in an airtight container, these homemade baked chips can stay fresh for a few days. However, they may lose some of their crispiness over time, so it's best to enjoy them as soon as possible.
How to Create Authentic Midwest-Style Baked Beans
You may want to see also
Frequently asked questions
To make baked hot chips, start by preheating your oven to 400°F (200°C). Next, wash and scrub your potatoes to remove any dirt or debris. You can leave the skin on if you prefer. Slice the potatoes into thin, even strips using a sharp knife or a mandoline slicer.
Yes, you can use any type of potato for baked hot chips. Russet potatoes are a popular choice because they have a high starch content, which results in crispy chips. However, you can also use Yukon Gold or red potatoes if that's what you have on hand.
Soaking the potato slices in cold water for about 30 minutes before baking can help remove excess starch and result in crispier chips. However, if you're short on time, you can skip this step. Just make sure to thoroughly pat dry the sliced potatoes before baking to remove any moisture.
Bake the chips for approximately 25-30 minutes, or until they are golden brown and crispy. The cooking time may vary depending on the thickness of your potato slices and your oven's temperature accuracy, so keep an eye on them as they bake.
You can season the baked hot chips with a variety of flavors and spices. Some popular options include sea salt, black pepper, paprika, garlic powder, and dried herbs like rosemary or thyme. You can also experiment with different seasoning blends or sprinkle some grated Parmesan cheese on top for added flavor. Just remember to toss the sliced potatoes with the spices or seasonings before baking for an even distribution.